Part 2 in our Propagating Cacti and Succulents Series
- Part 1 - Propagating Paddle Cacti
- Part 2 - Propagating Agave (this article)
- Part 3 - Propagating Columnar Cacti
Part 2 in our Propagating Cacti and Succulents Series
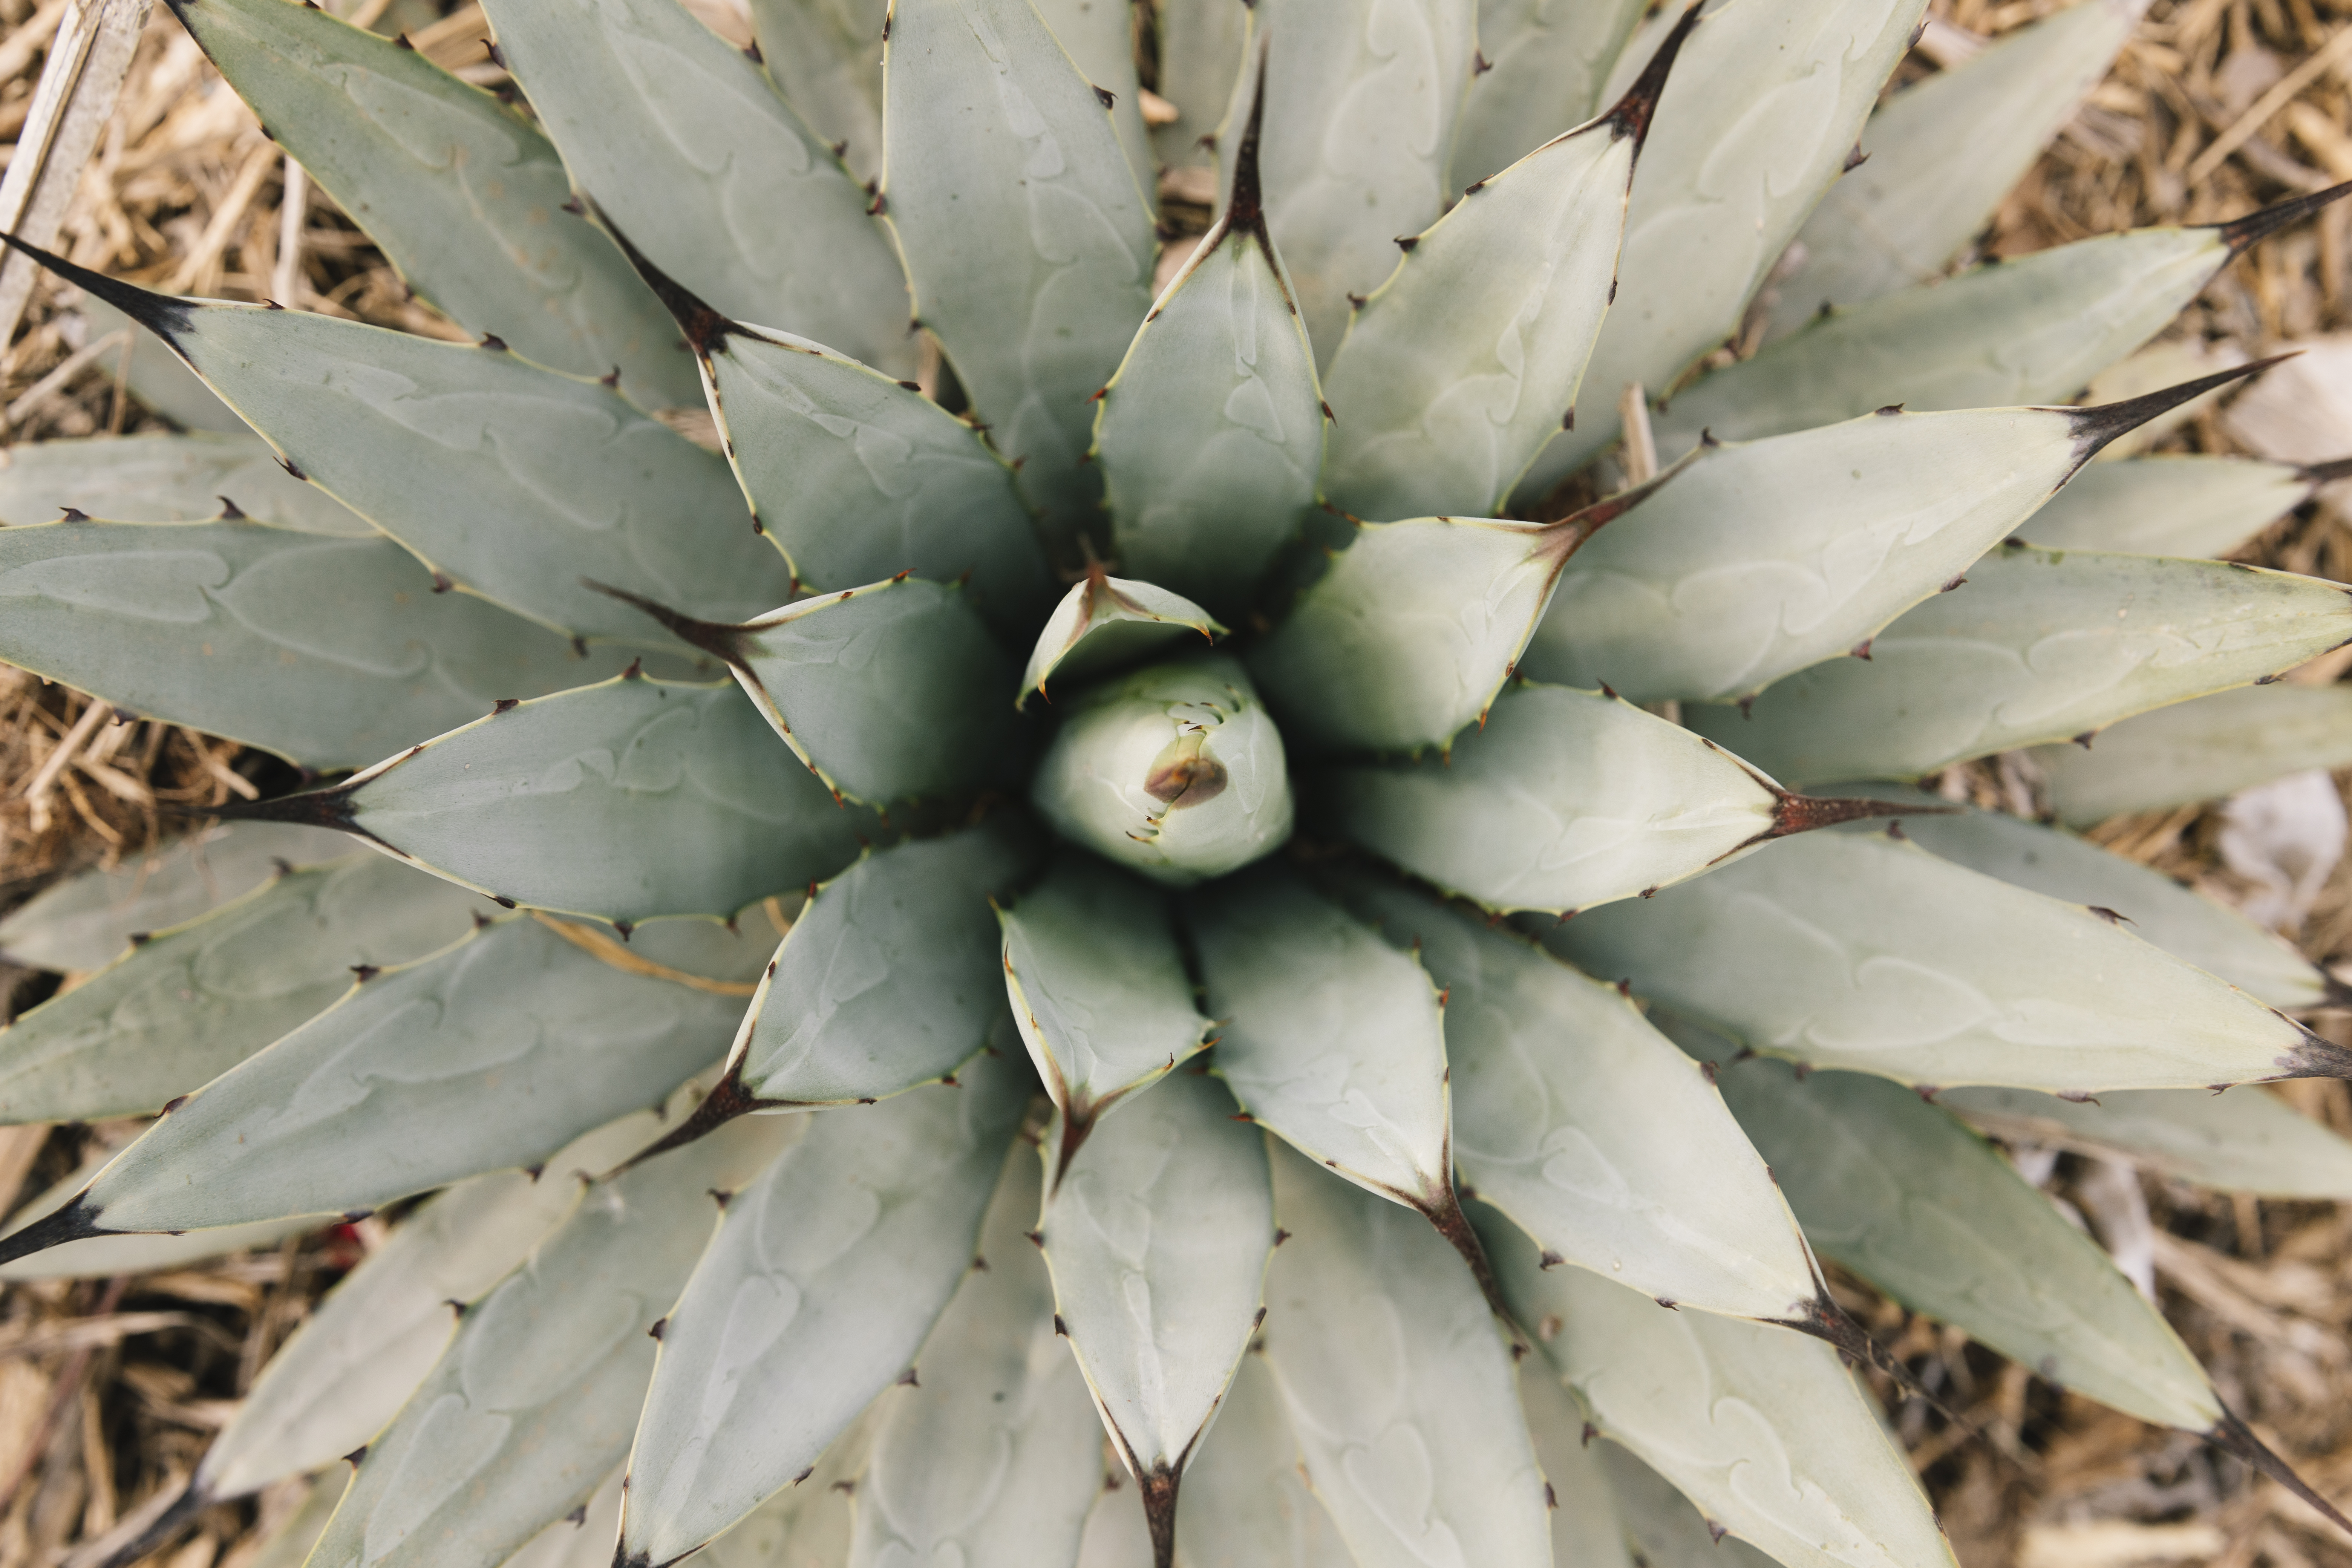
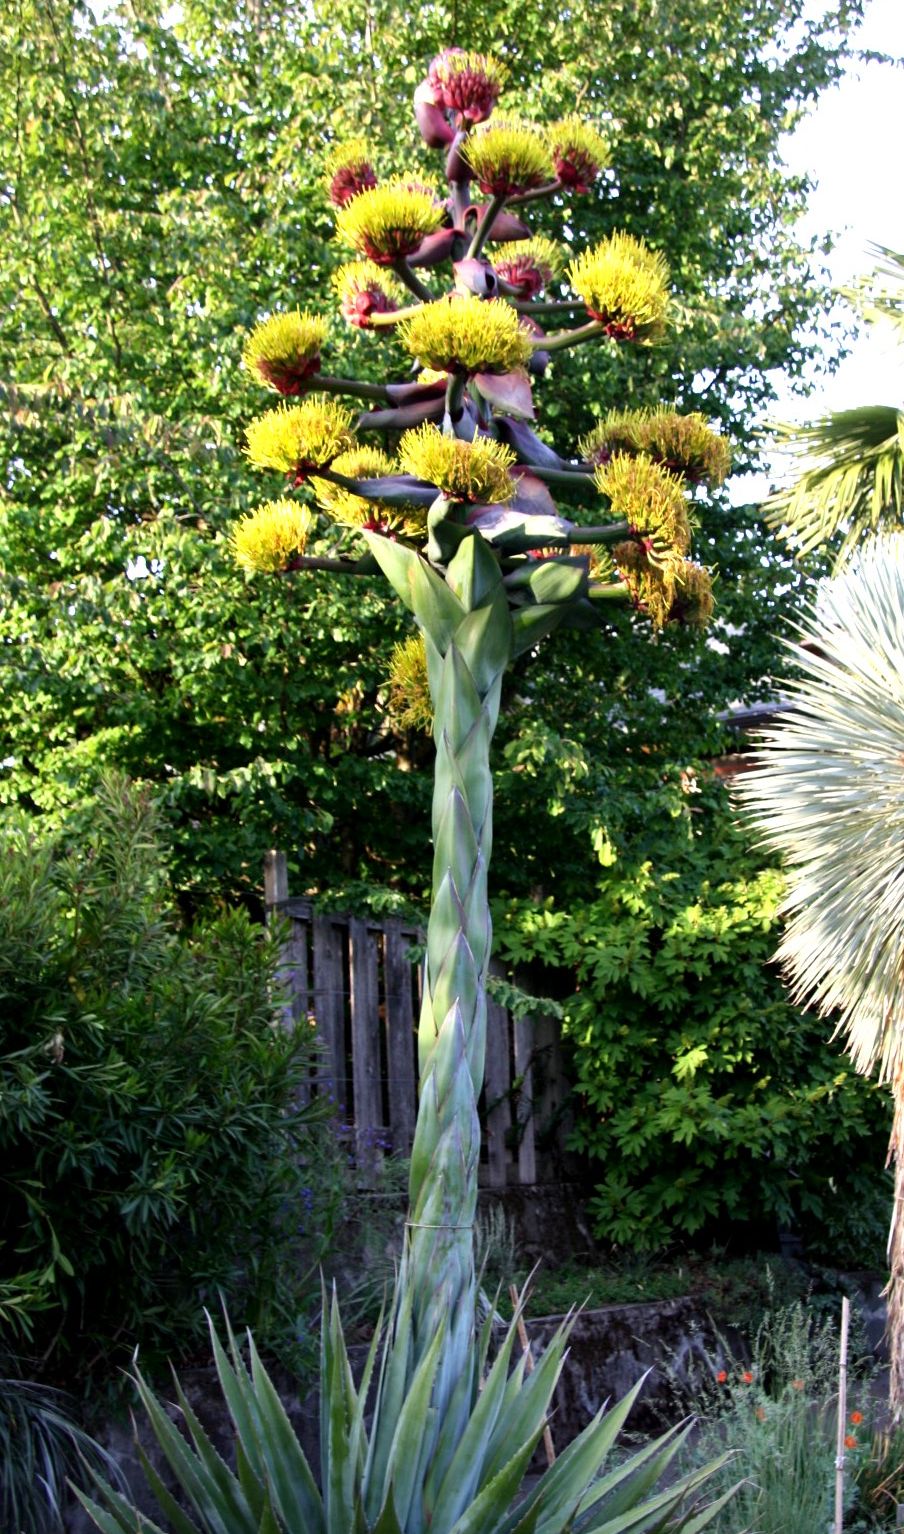
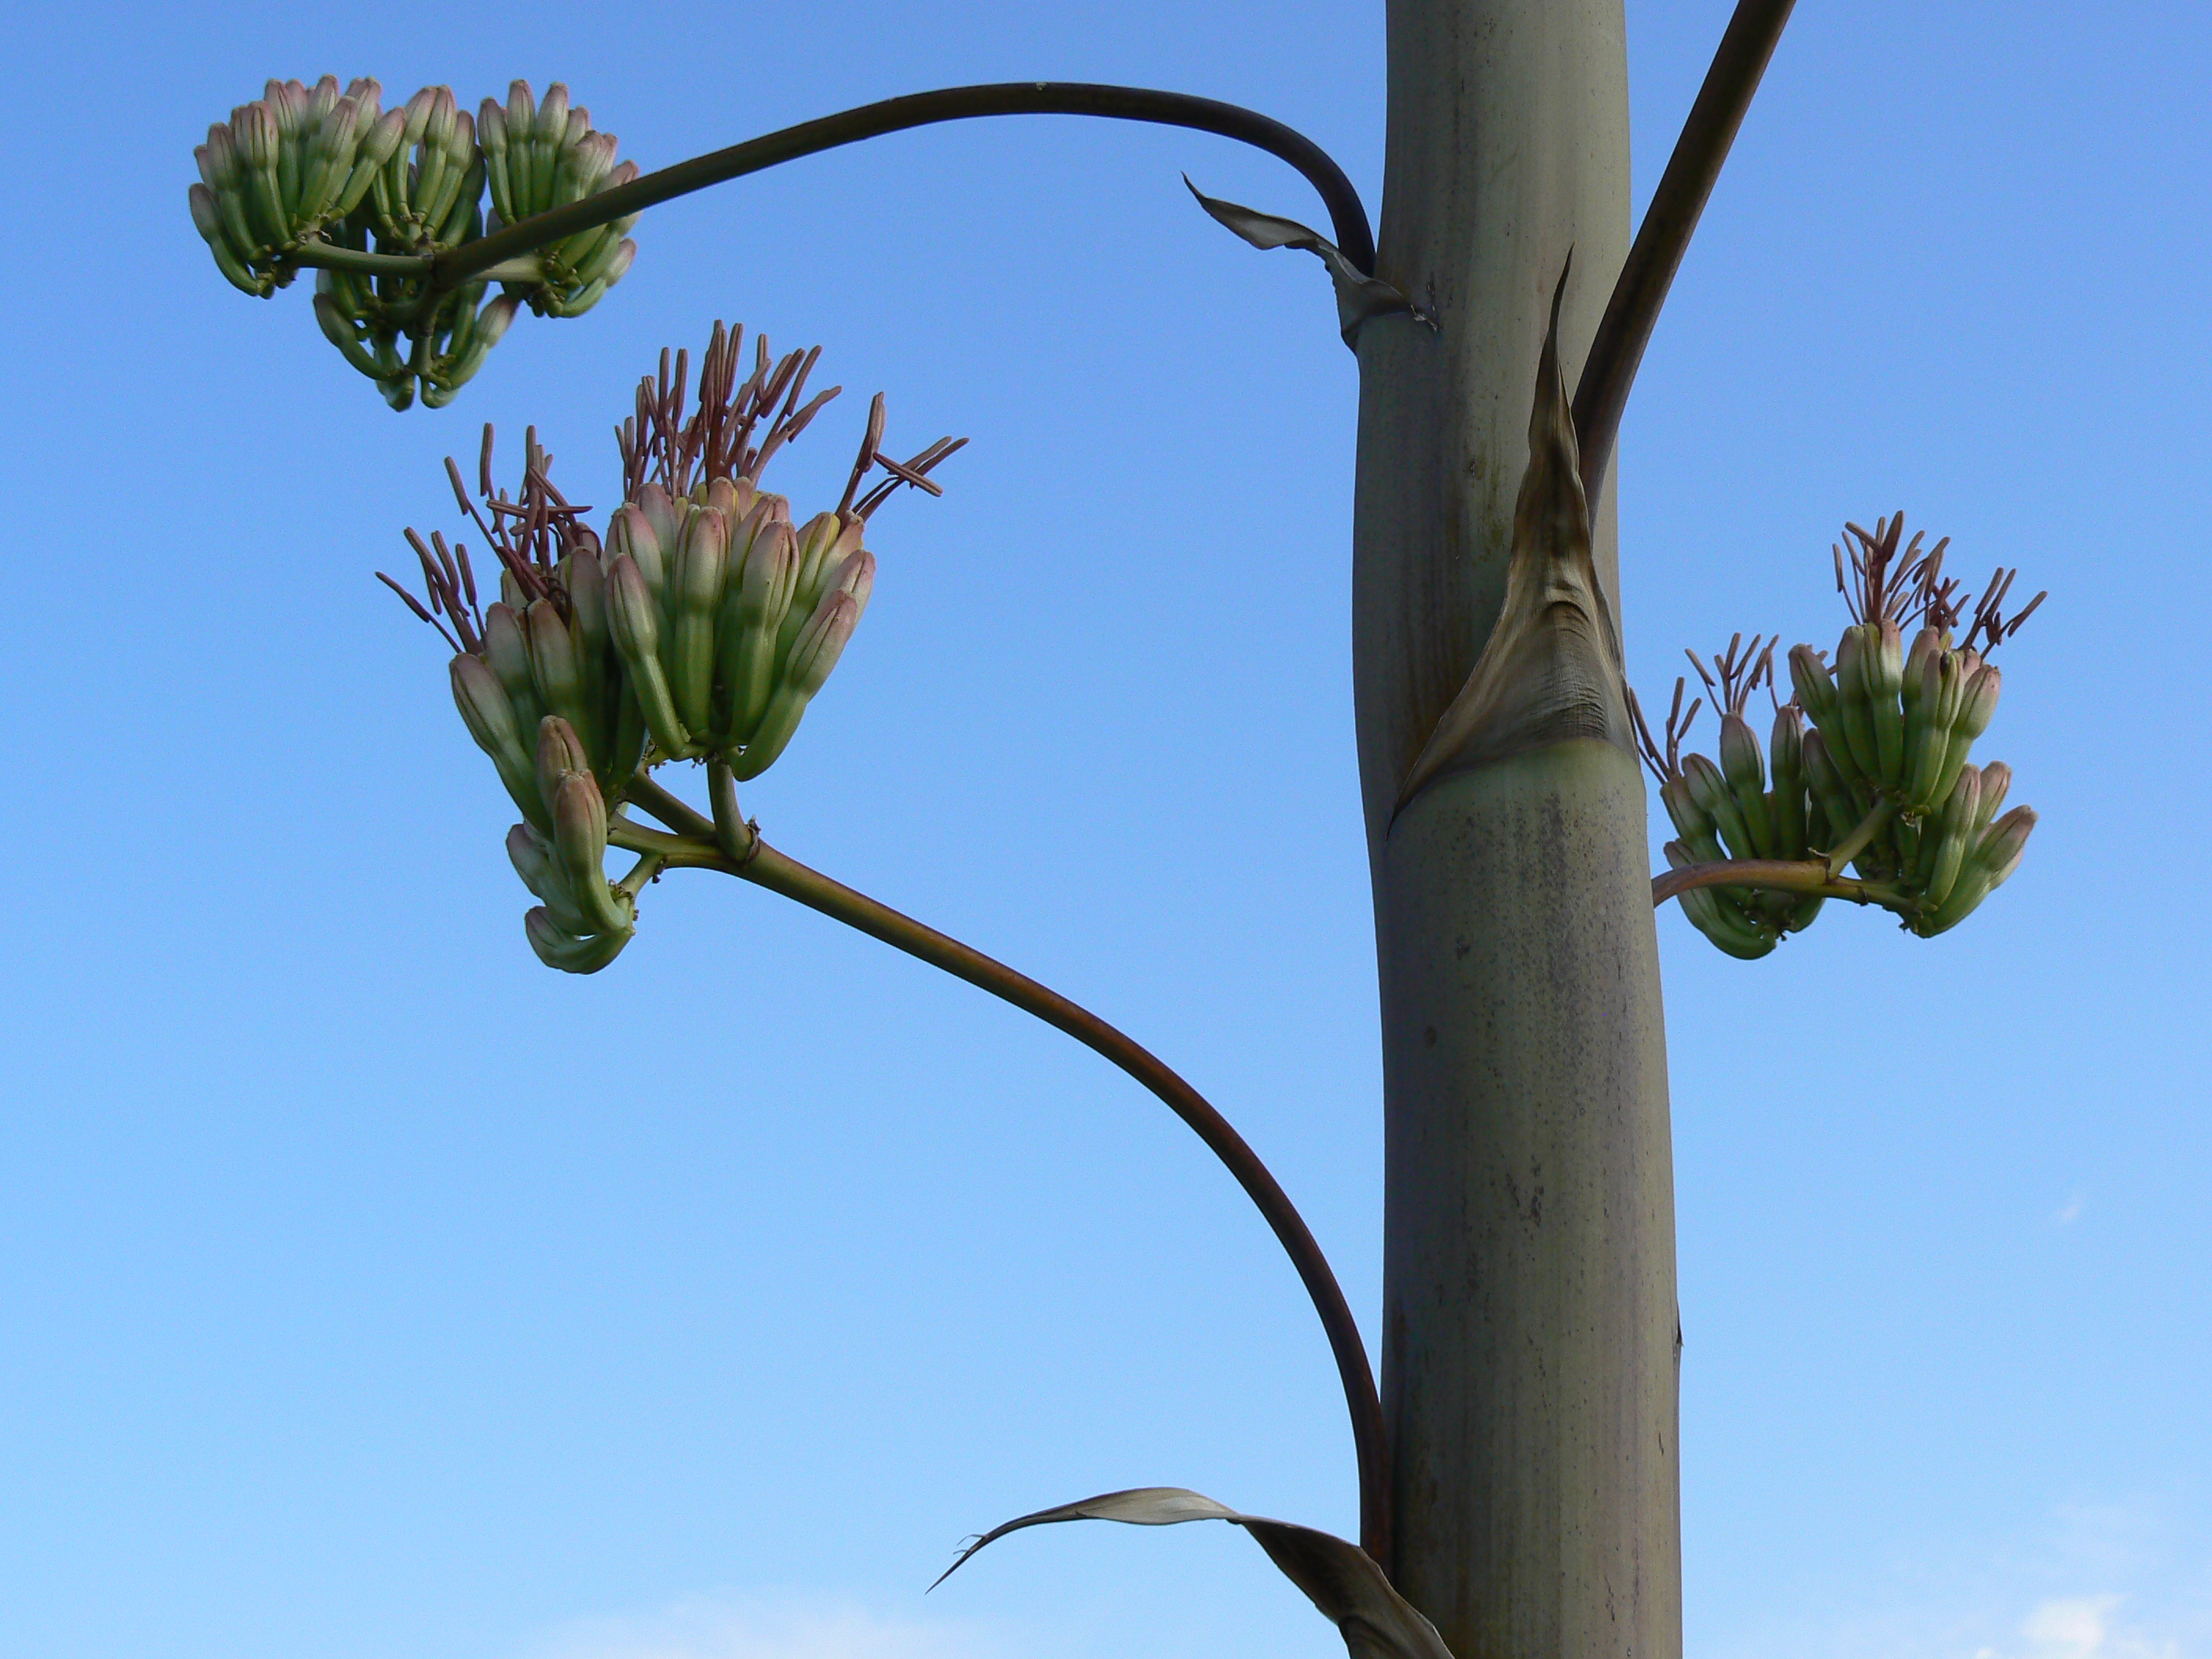
There are over 200 species of agave in this diverse genus of succulents. They are part of the asparagus family, and most are monocarpic, meaning they flower only once. Agaves bloom on tall stalks that resemble oversized asparagus spears, producing seeds and sometimes bulbils.
Agaves are incredibly resilient plants and a staple in desert and xeriscape gardens. Their thick leaves, fibrous roots, and carbohydrate‑rich cores allow detached pups and bulbils to survive long periods with minimal water while they establish new roots.
In this article, we’ll dive into propagation techniques and methods for growing agave. Let’s dive in.
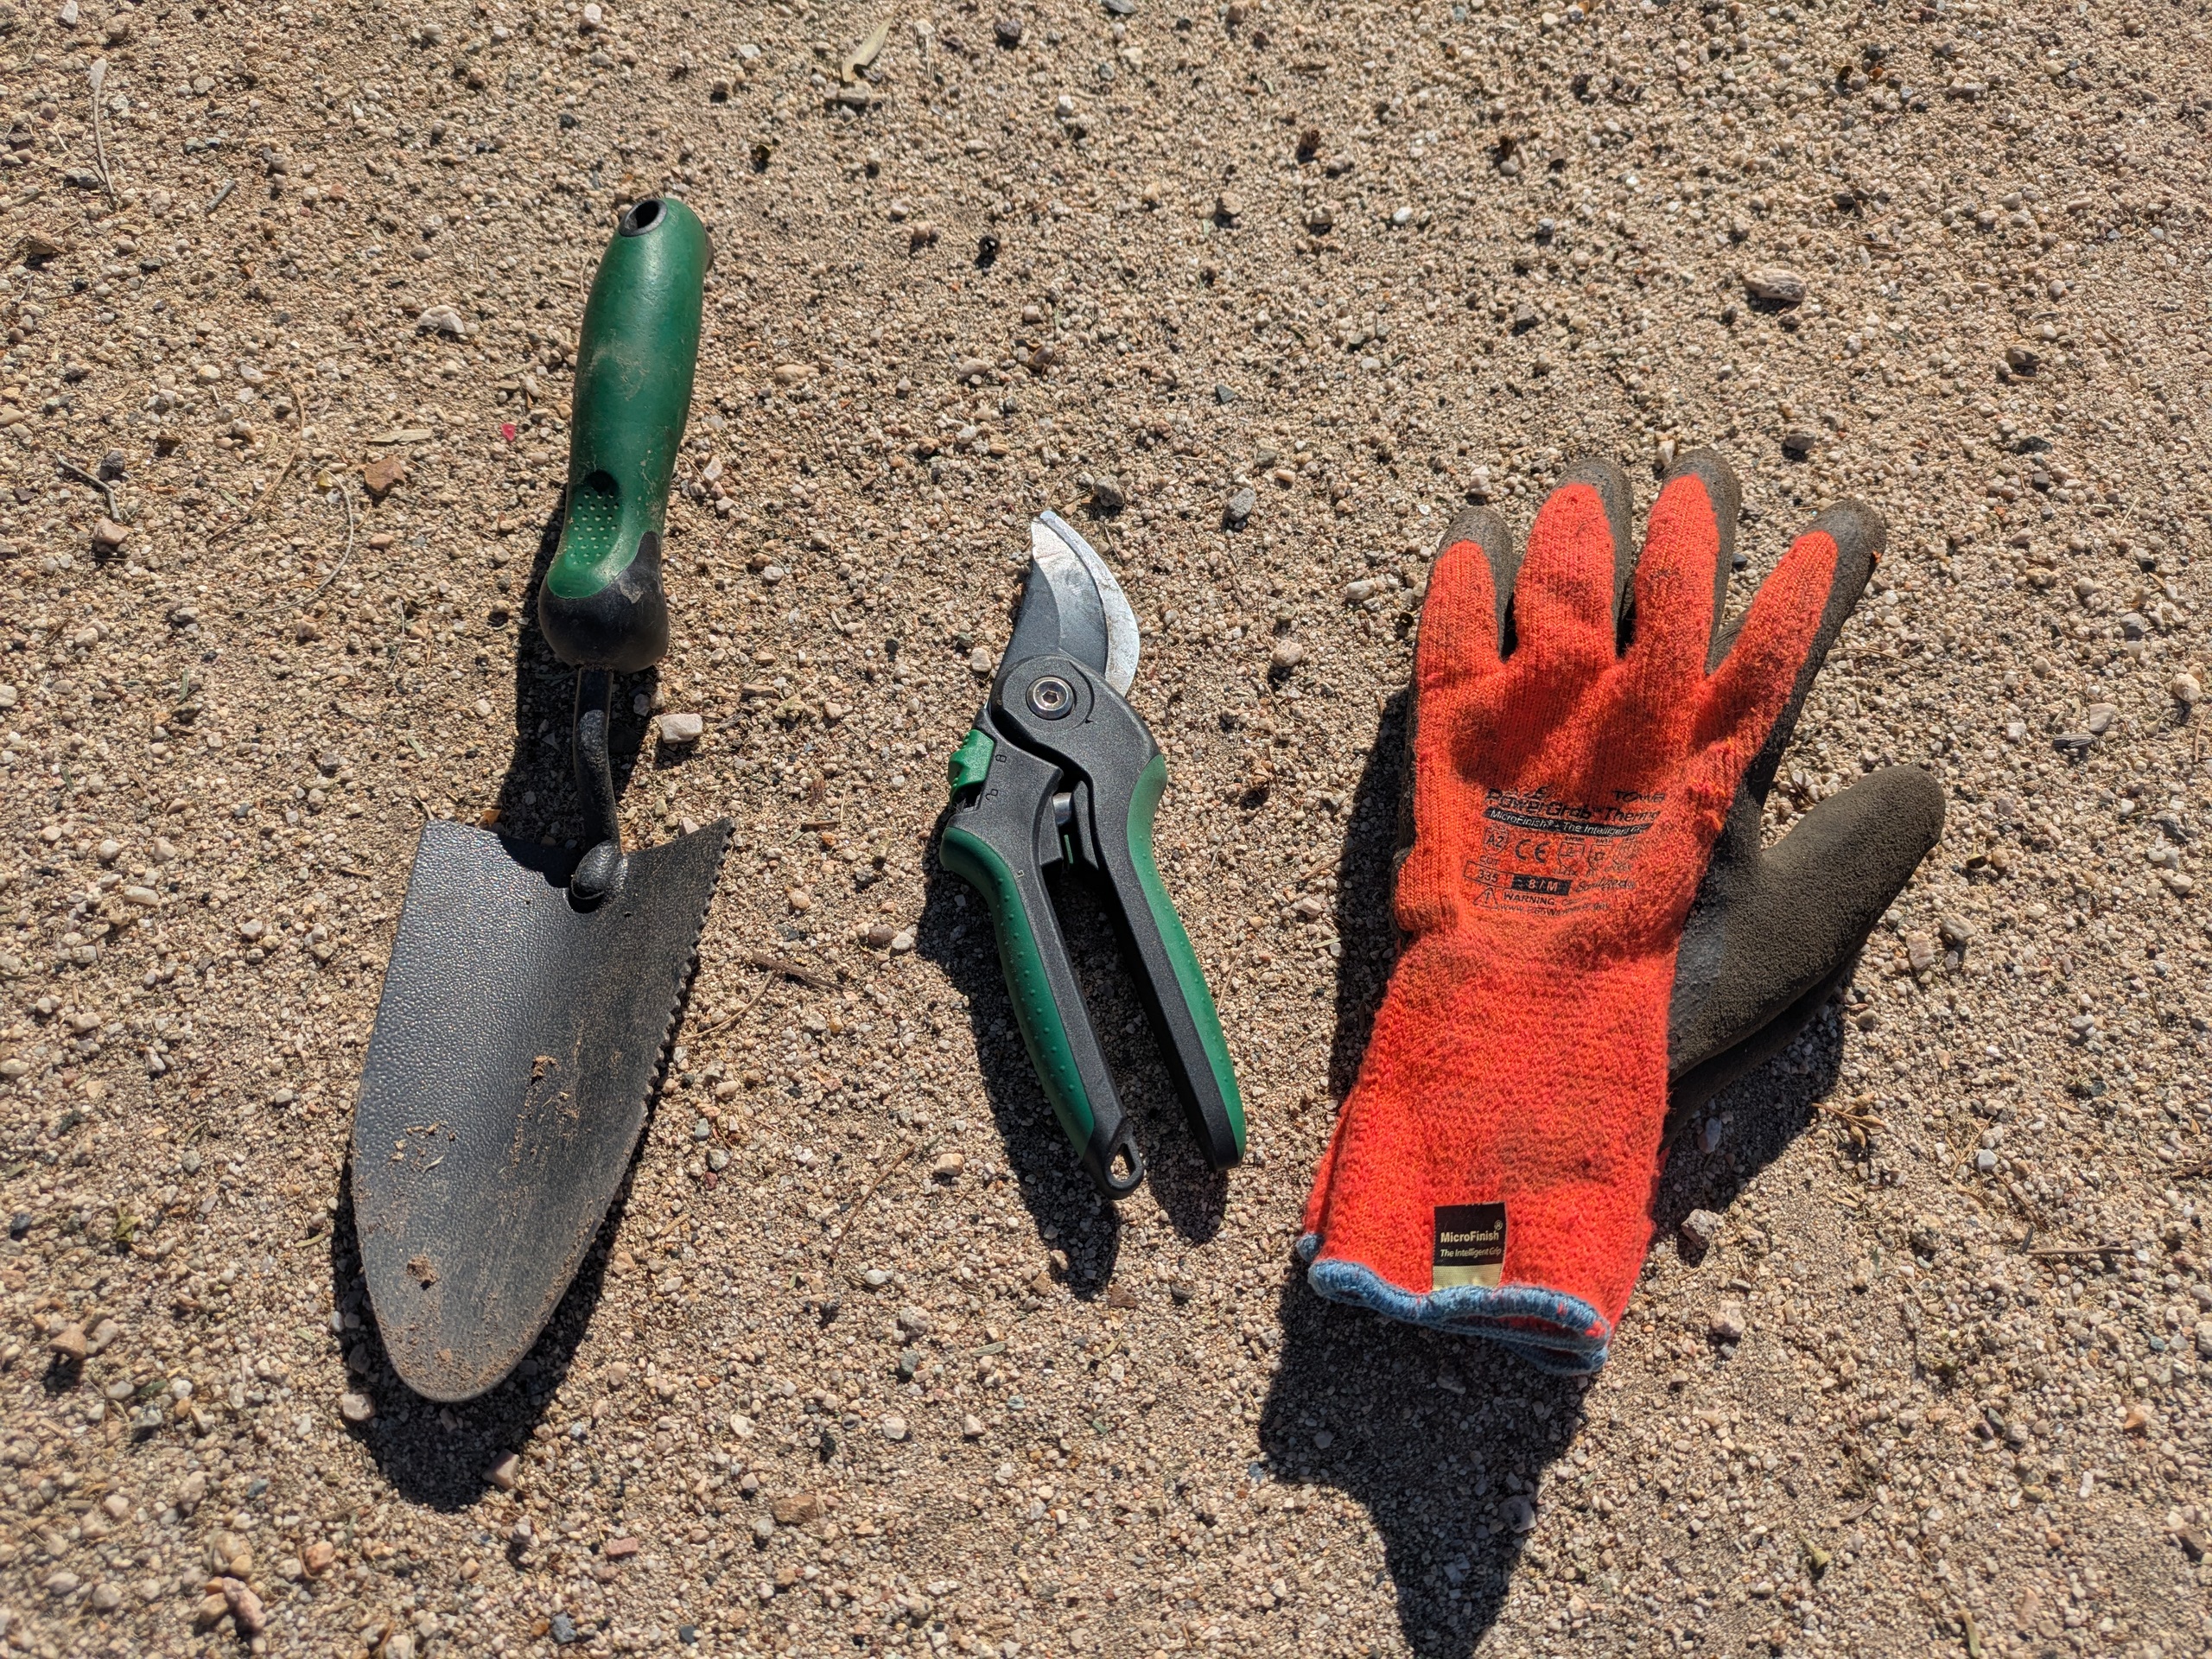
Gloves and long sleeves are helpful when working with agave. Eye protection can also help when working with larger mother plants.
There are three main methods for agave propagation, and each comes at a different stage of an agave’s life cycle.
This is the easiest and most accessible method, as most agave species produce pups regularly. Agave americana, for example, will produce a handful of pups every year if the conditions are right and the plant is mature enough – usually after 3-4 years. Some agaves are solitary, however, such as A. ovatifolia, which won’t produce pups until they flower.
Choosing a Good Pup
A few cues help you pick the strongest candidates:
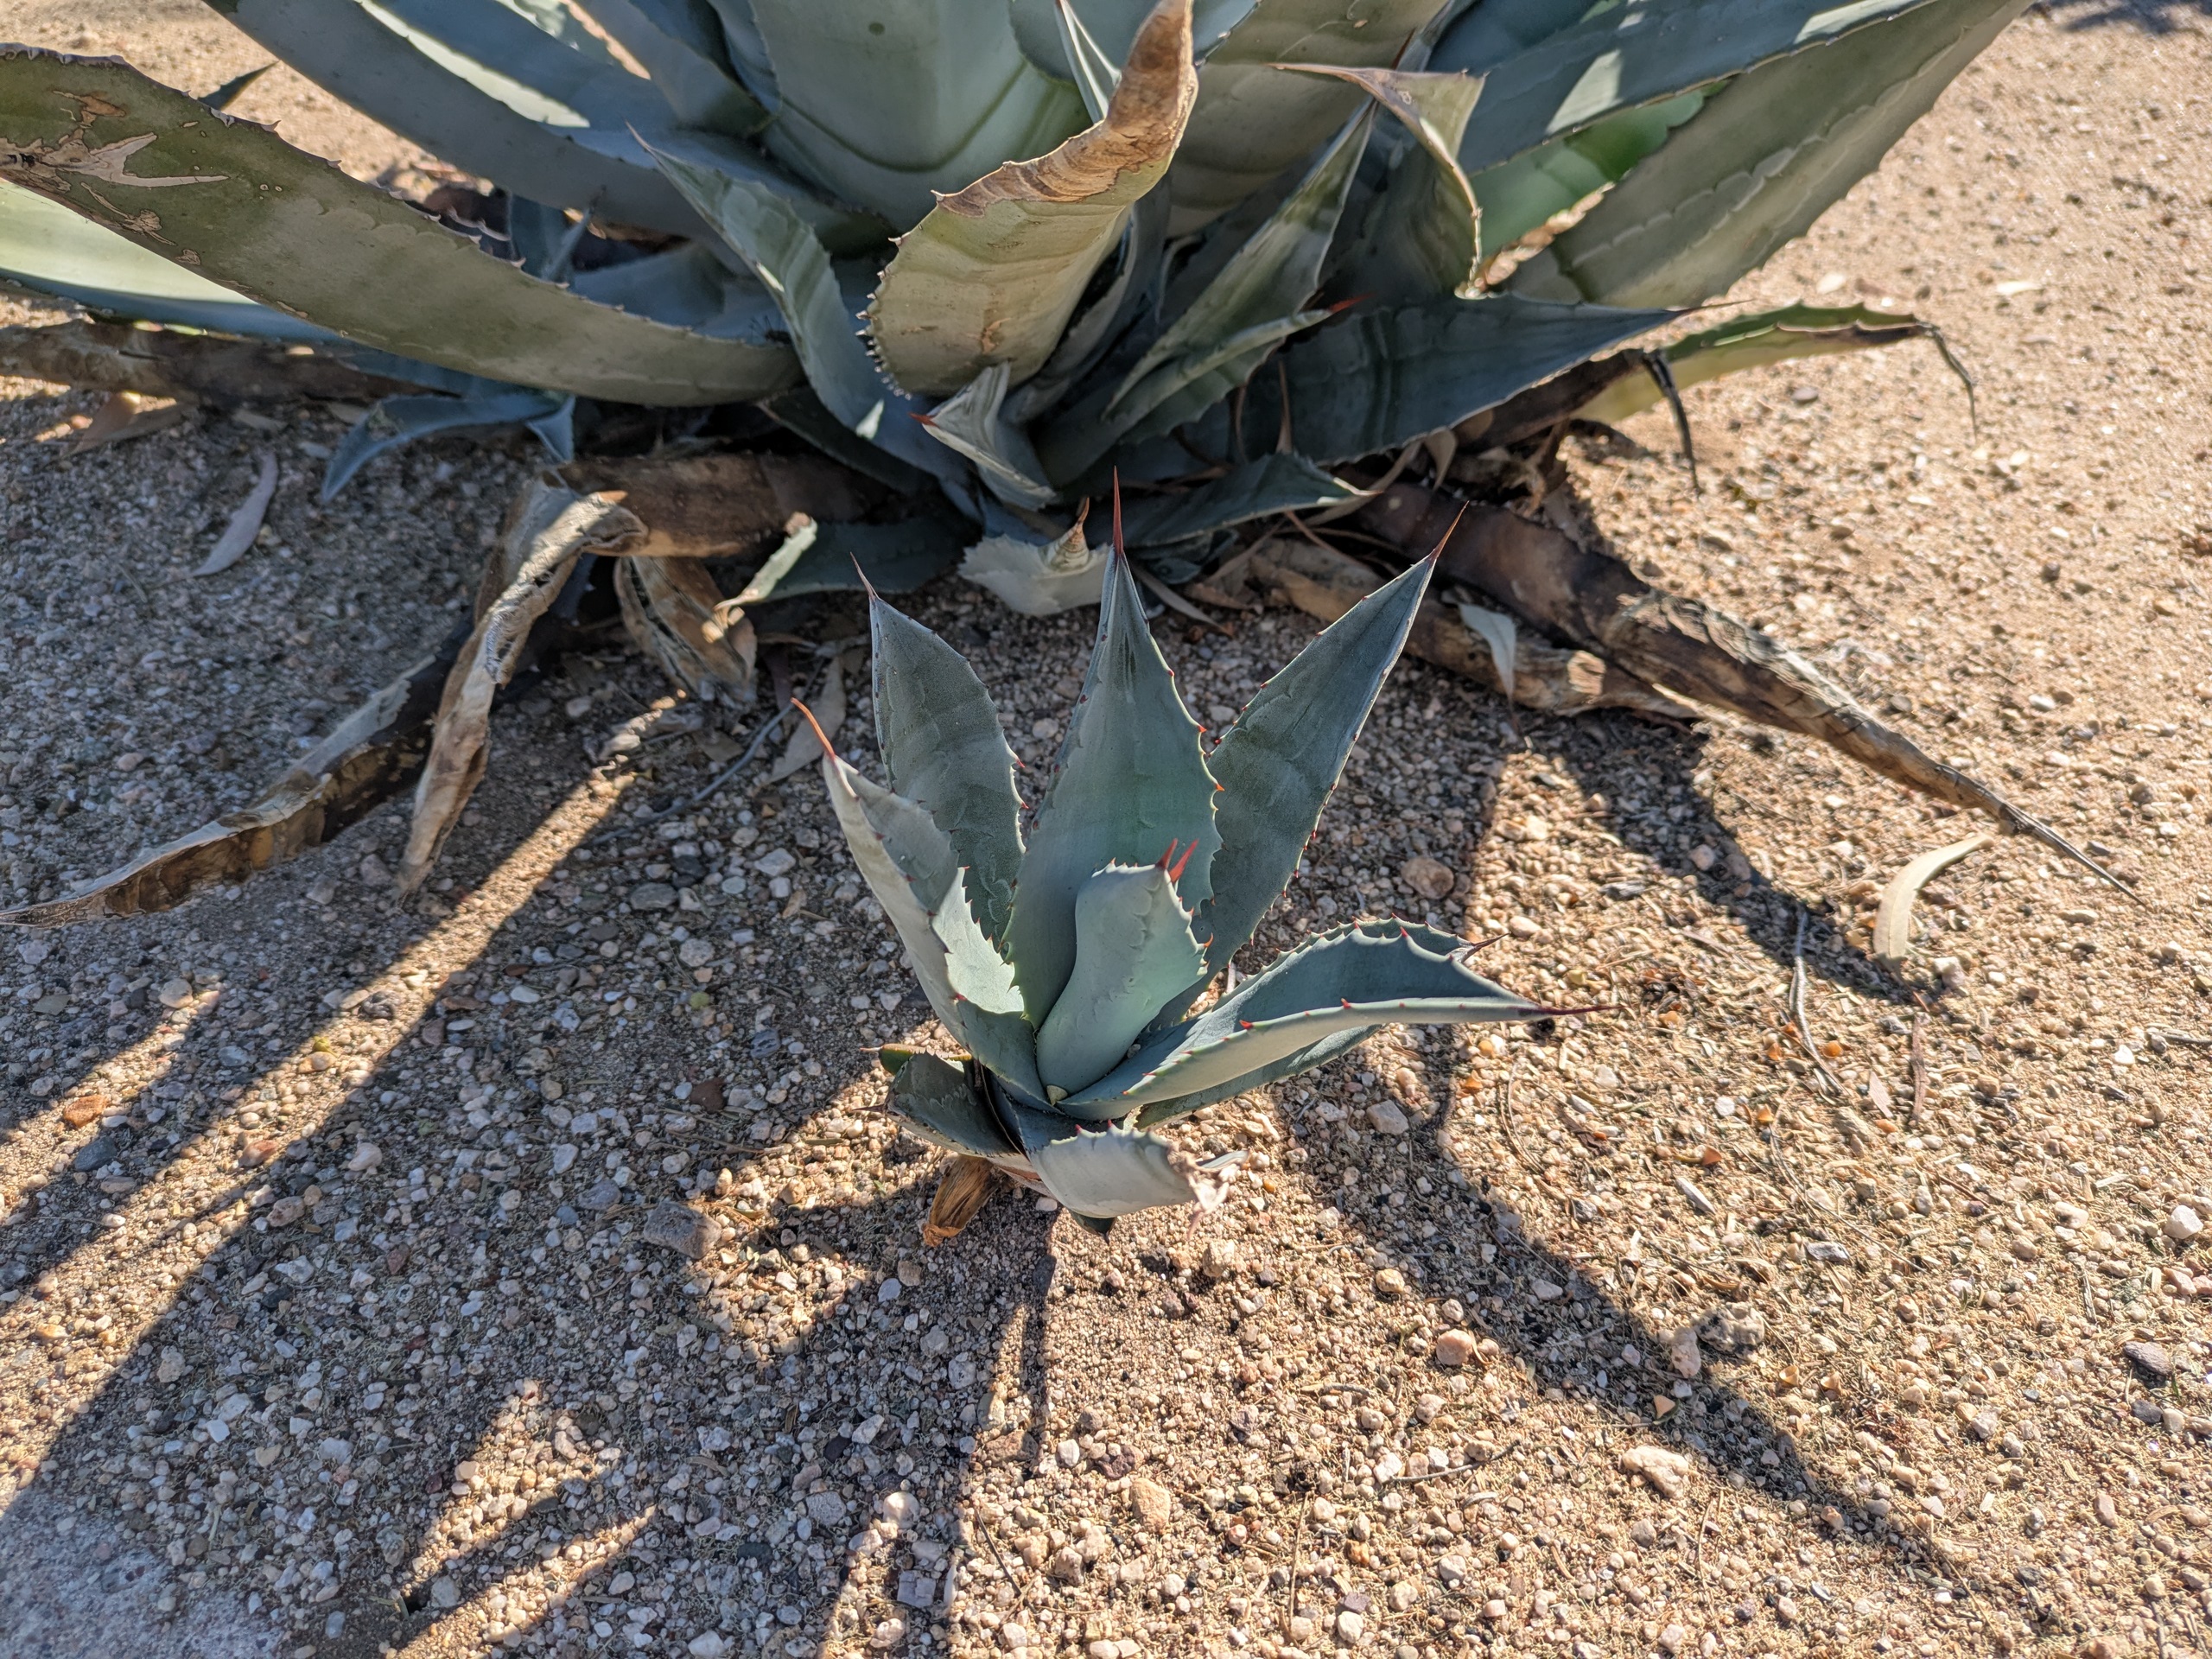
Avoid pups that are yellowing, shriveled, or growing in deep shade under the parent—they often struggle to establish.
Tools you’ll need
Steps:
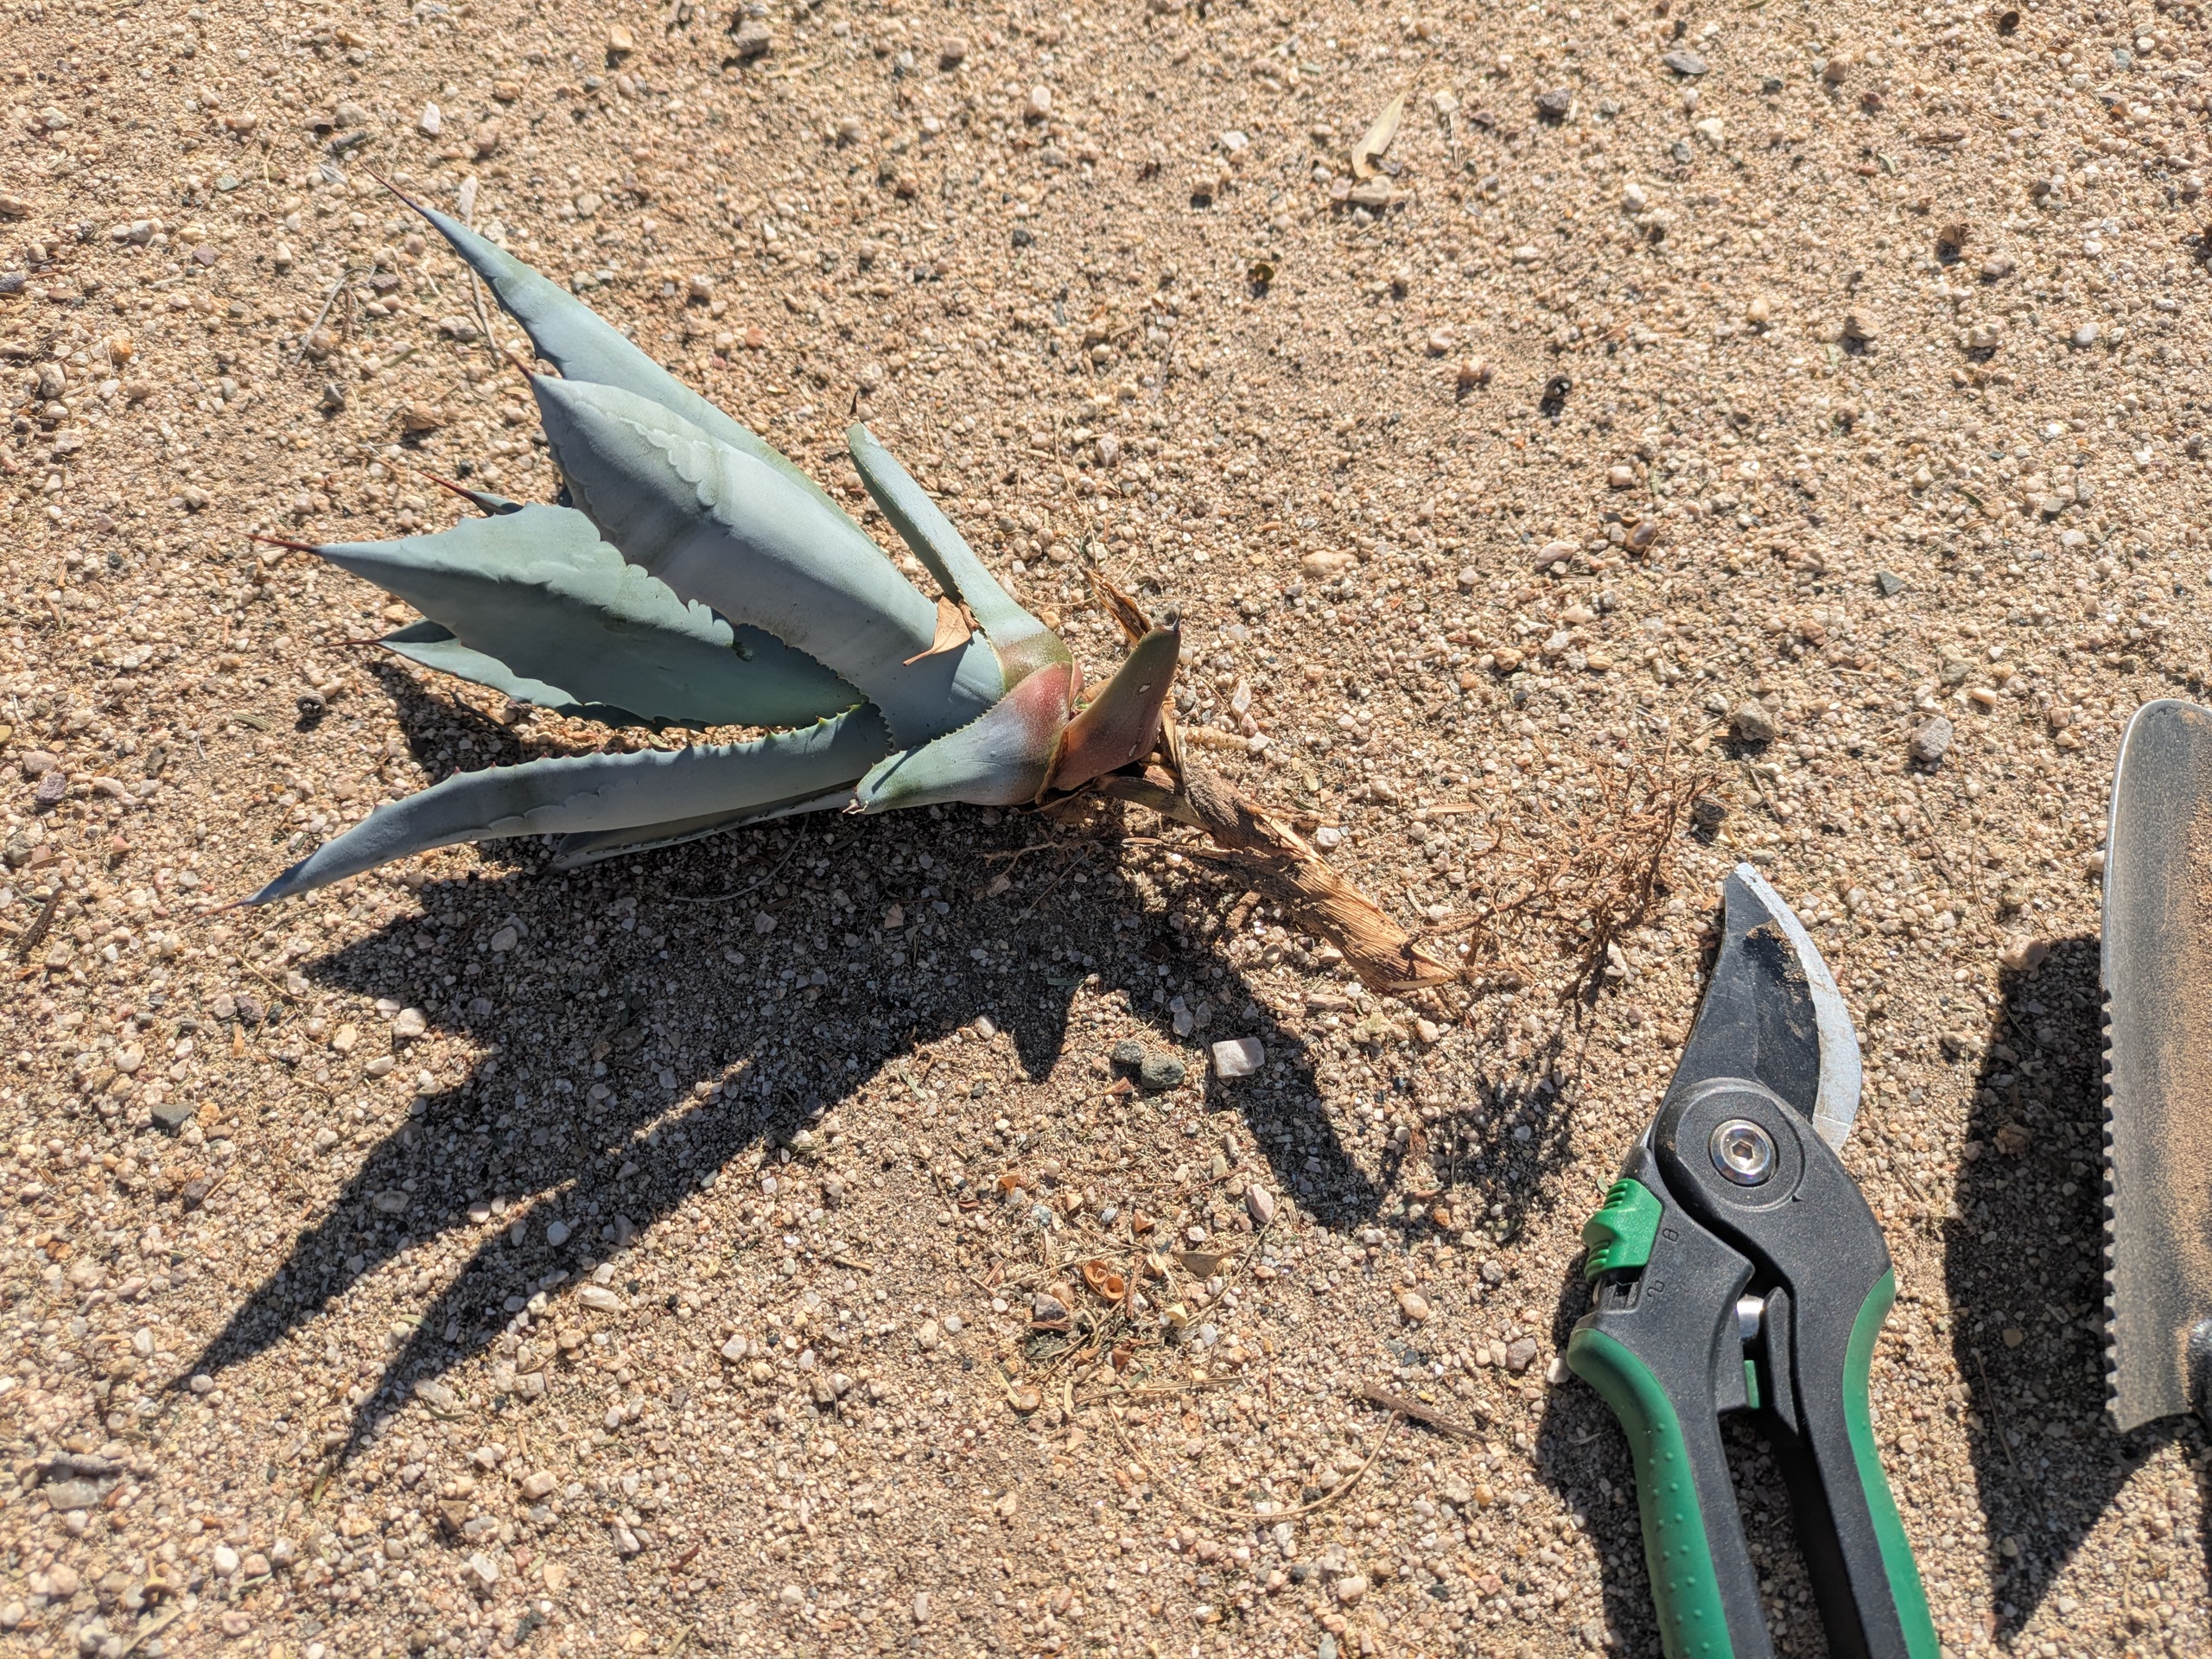
Use the trowel to gently excavate around the pup until you can see where it connects to the mother plant, keeping as many roots intact as possible. Not all pups will have roots, and that’s okay.
Removing the Pup
If the pup is attached by a fleshy tuber or rhizome, cut it as close to the mother plant as you can. Avoid ripping or twisting as the flesh is delicate. Loosen the surrounding soil and lift the pup from the base, keeping any attached roots intact.
Callusing
Set the pup in bright, indirect light for one to three days. The cut end should dry into a firm, matte, corky surface. If the pup has no tuber, only roots, you can plant it immediately, either in a pot or in the ground.
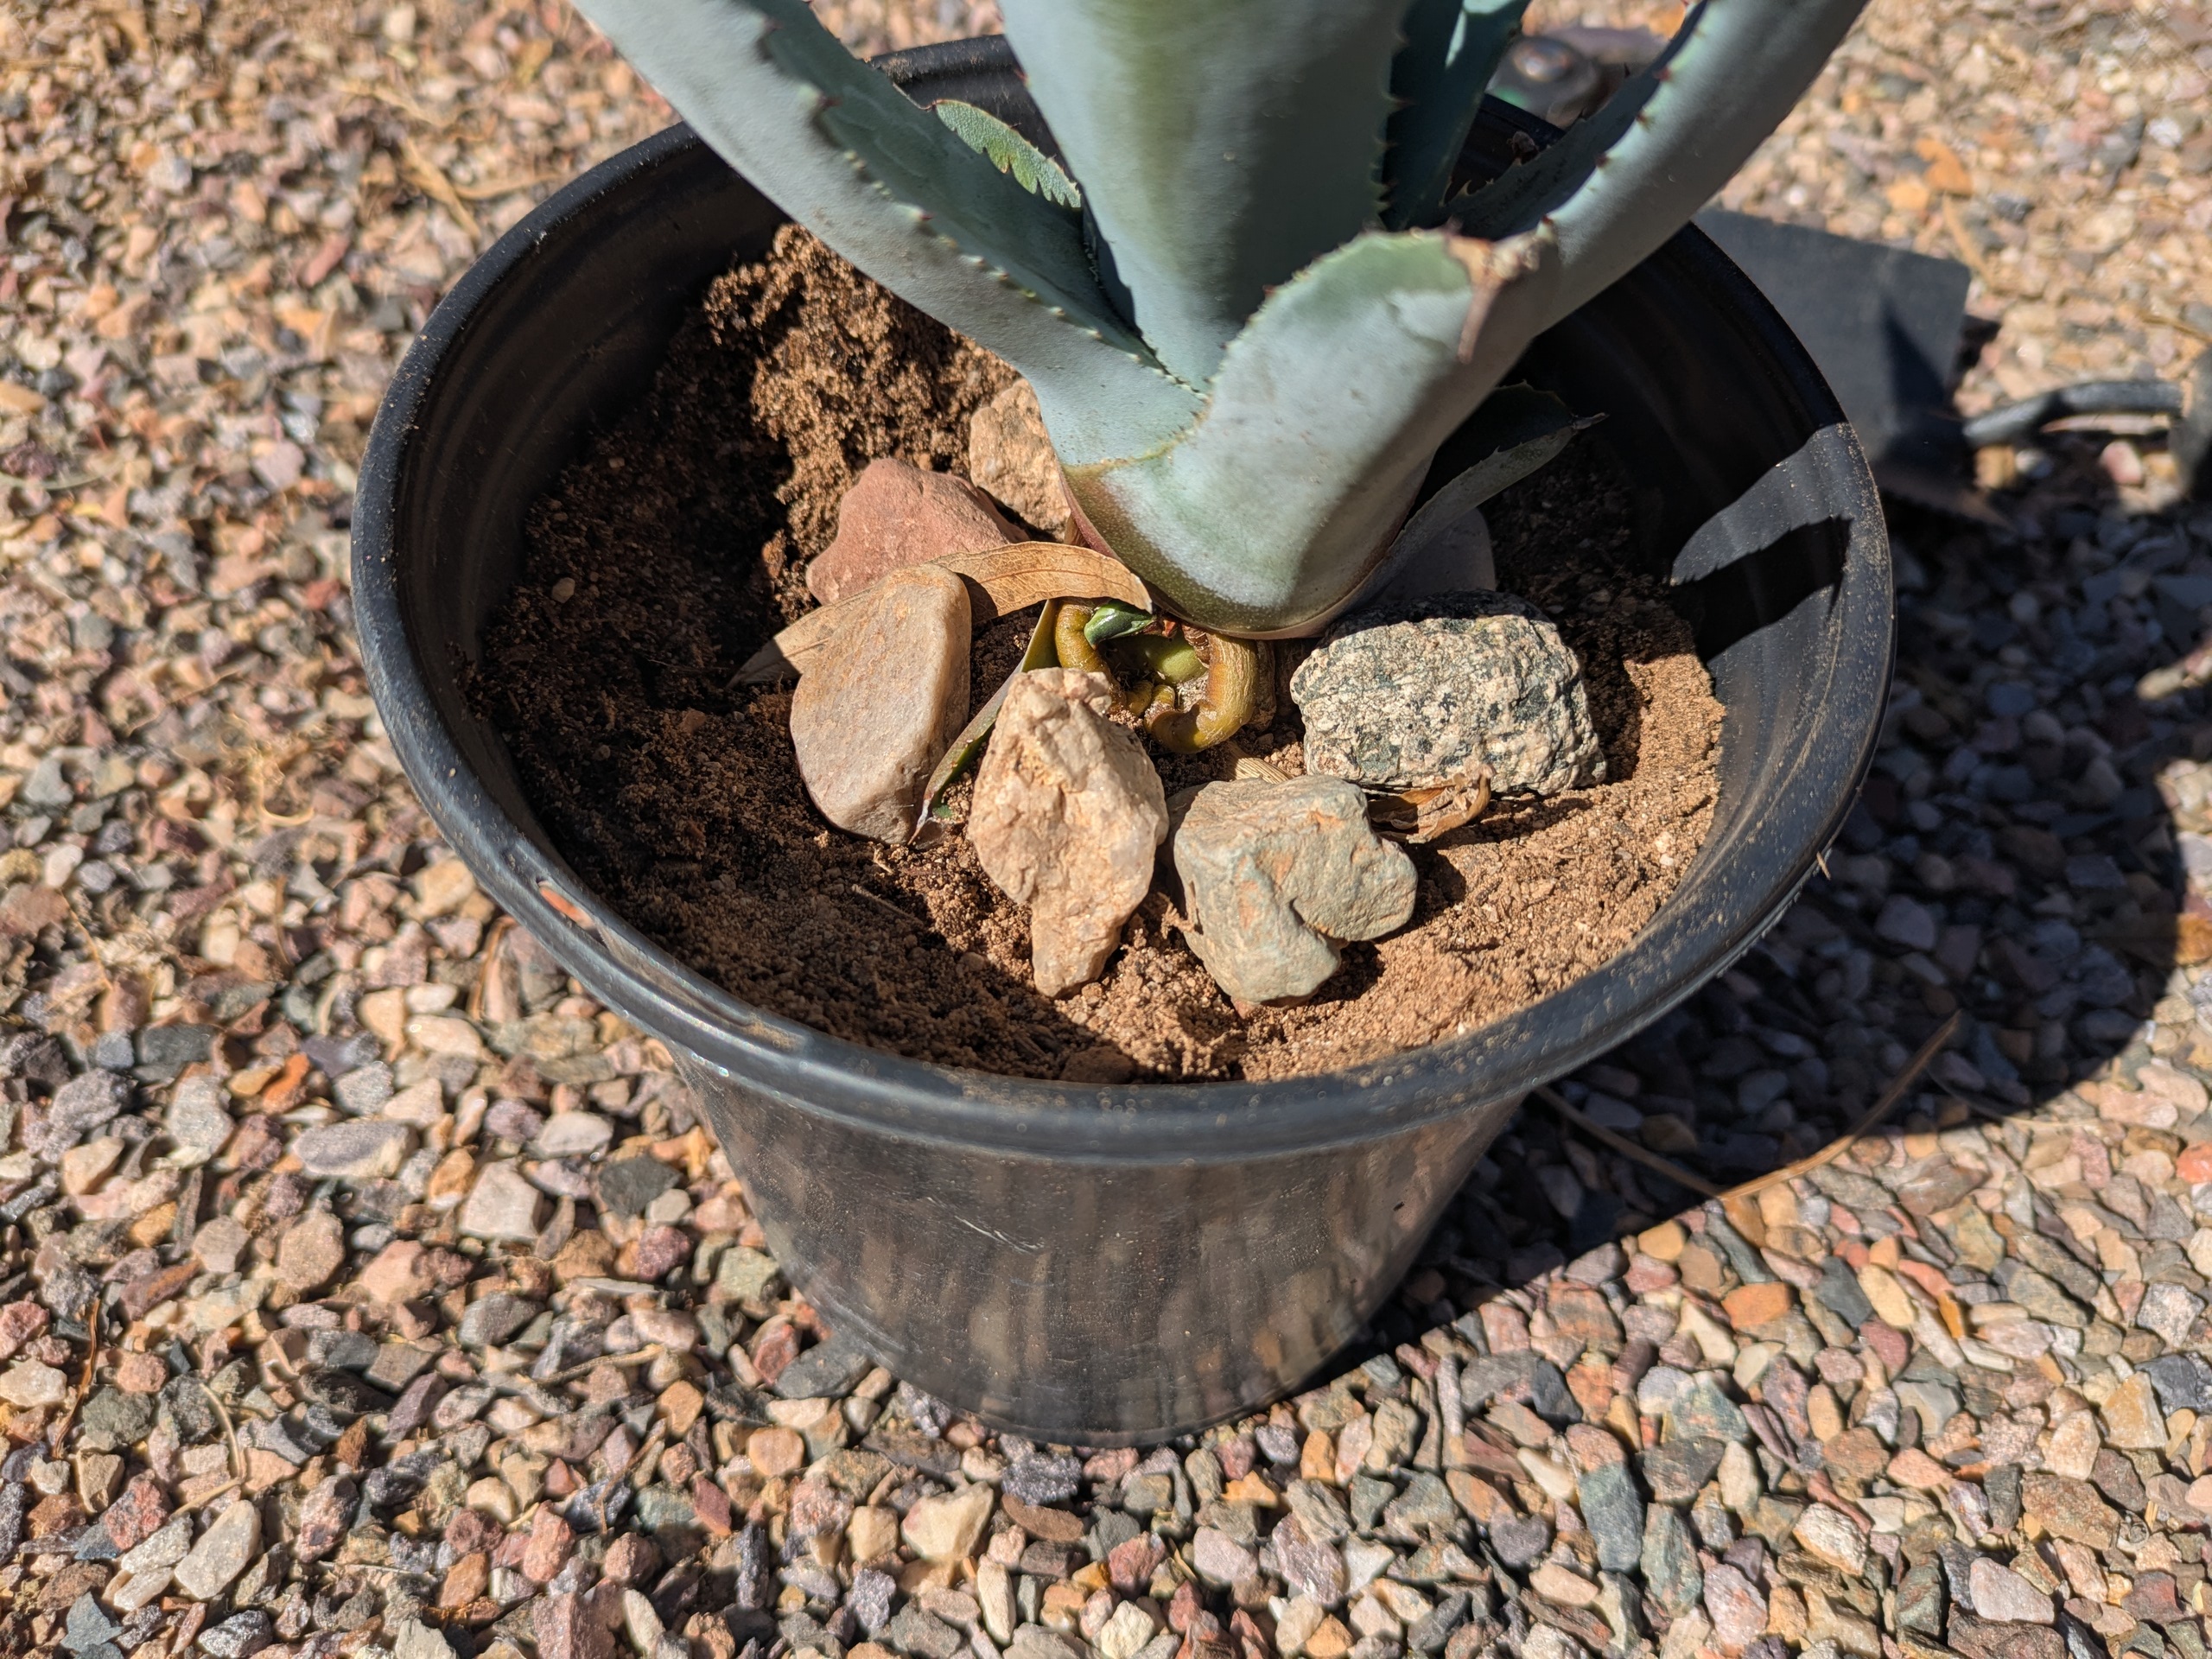
Planting
Place the pup so the base sits on the soil surface. Agaves are prone to rotting at the rosette base, so bury only the roots and tubers.
Early Watering
Water until the soil is damp, then let it dry completely. After that, water sparingly but regularly to encourage new root growth—once a week is a good guide.
Transplanting
When the pup has firm roots and a rich, even color, it’s ready for the ground or a larger pot. Acclimate it to full sun before planting. Water every two weeks for 1-2 months, then let natural rainfall take over. Some agave root in a matter of weeks, while others take a few months.
Agaves transplant best when replanted in the same orientation they were growing. Marking the pot or the plant before removal makes it easy to keep track of this.
Bulbils are the second major way to propagate agave. When a mature plant sends up its towering flower stalk, some species produce hundreds of tiny plantlets along the spent bloom stems.
Not every agave makes bulbils. Species such as Agave americana and A. vivipara are very reliable producers, while others, such as Agave shawii, do not produce any at all.
" by [Mary Gillham Archive Project](https://www.flickr.com/photos/139791896@N06) is licensed under [CC BY 2.0](https://creativecommons.org/licenses/by/2.0/?ref=openverse).](https://4w1qaaek5t.ucarecd.net/1a3afde6-fff6-4c3a-97ee-18295be0ddc8/37603052852_b82fe0c013_b.jpg)
Harvesting and Rooting Bulbils
Bulbils root easily and with a high success rate. By late summer, as the stalk dries, they typically reach 2–3 inches tall and develop a pale, slightly white base. A gentle tug should detach them; if they resist or feel soft, give them more time.
Tools you’ll need
Steps:
With your hands, detach the bulbil with a gentle tug. Avoid tearing the base—this is where new roots will emerge.
Callusing
Allow 1-5 days of callusing. Once the base has turned white and looks a little corky, they’re ready to plant.
Planting
Set the bulbil on top of a gritty cactus mix and nestle it slightly into the surface. A coarse, fast‑draining blend prevents moisture from lingering around the base. Pebbles are good for support.
Early Watering
Keep the soil barely moist. Light misting every few days is usually enough until roots form.
Increasing Water
When the bulbil resists a gentle tug or begins producing new leaves, shift to deeper but infrequent watering—about once a week.
Transplanting
When the bulbil has firm roots and a rich, even color, it’s ready for the ground or a larger pot. Acclimate it to full sun before planting. Water every two weeks for 1-2 months, then let natural rainfall take over. Some agave root in a matter of weeks, while others take a few months.
Seed propagation is the slowest but most genetically diverse way to grow agave. While pups and bulbils produce clones, seeds introduce variation that strengthens long‑term resilience. Agave seeds are short‑lived, so fresher seed almost always germinates better than older seed.
Seeds develop in pods along the main flowering stalk. Each pod contains dozens of seeds and is ready to harvest when it turns brown and begins to split. Because the stalk can be quite tall, you may need a ladder to safely collect a few mature pods.
Once you’ve collected the pods, the seeds need a short drying period to ensure they store well and germinate cleanly. Fresh pods often hold a bit of residual moisture, and drying helps prevent mold.
Most agave seed is viable for just 1-2 years after gathering.
Warmth, light, and a gritty, sterile medium are the three pillars of successful germination. Agave seedlings are surprisingly easy to grow when these conditions are met.
Planting in late spring is best. Warm soil (70–85°F) speeds germination and reduces the risk of fungi.
Tools you’ll need
Steps
Prepare the soil.
Fill your tray or pots with a gritty, sterile mix.
Sow the seeds.
Press the seeds gently into the surface. They need light to germinate, so keep them only lightly covered.
Moisten and cover.
Mist the soil until damp, then cover the tray with a humidity dome. Keep the mix lightly moist—not wet—and vent daily to prevent fungal growth.
Provide bright, indirect light.
Most seeds germinate within 7–21 days under warm, bright conditions.
Care for seedlings.
Once sprouted, water from the bottom to avoid disturbing the roots and allow the soil to dry slightly between waterings.
Transplant when sturdy.
When seedlings have several true leaves and a small root system, move them into individual pots filled with gritty cactus mix. Water them deeply and infrequently, watching for signs of over- and under-watering.
Watch and wait.
After 1–2 years of steady growth and proper acclimation, young agaves are ready for transplanting into the garden in spring. Acclimate young starts in the same way you would pups or bulbils in early-mid spring.
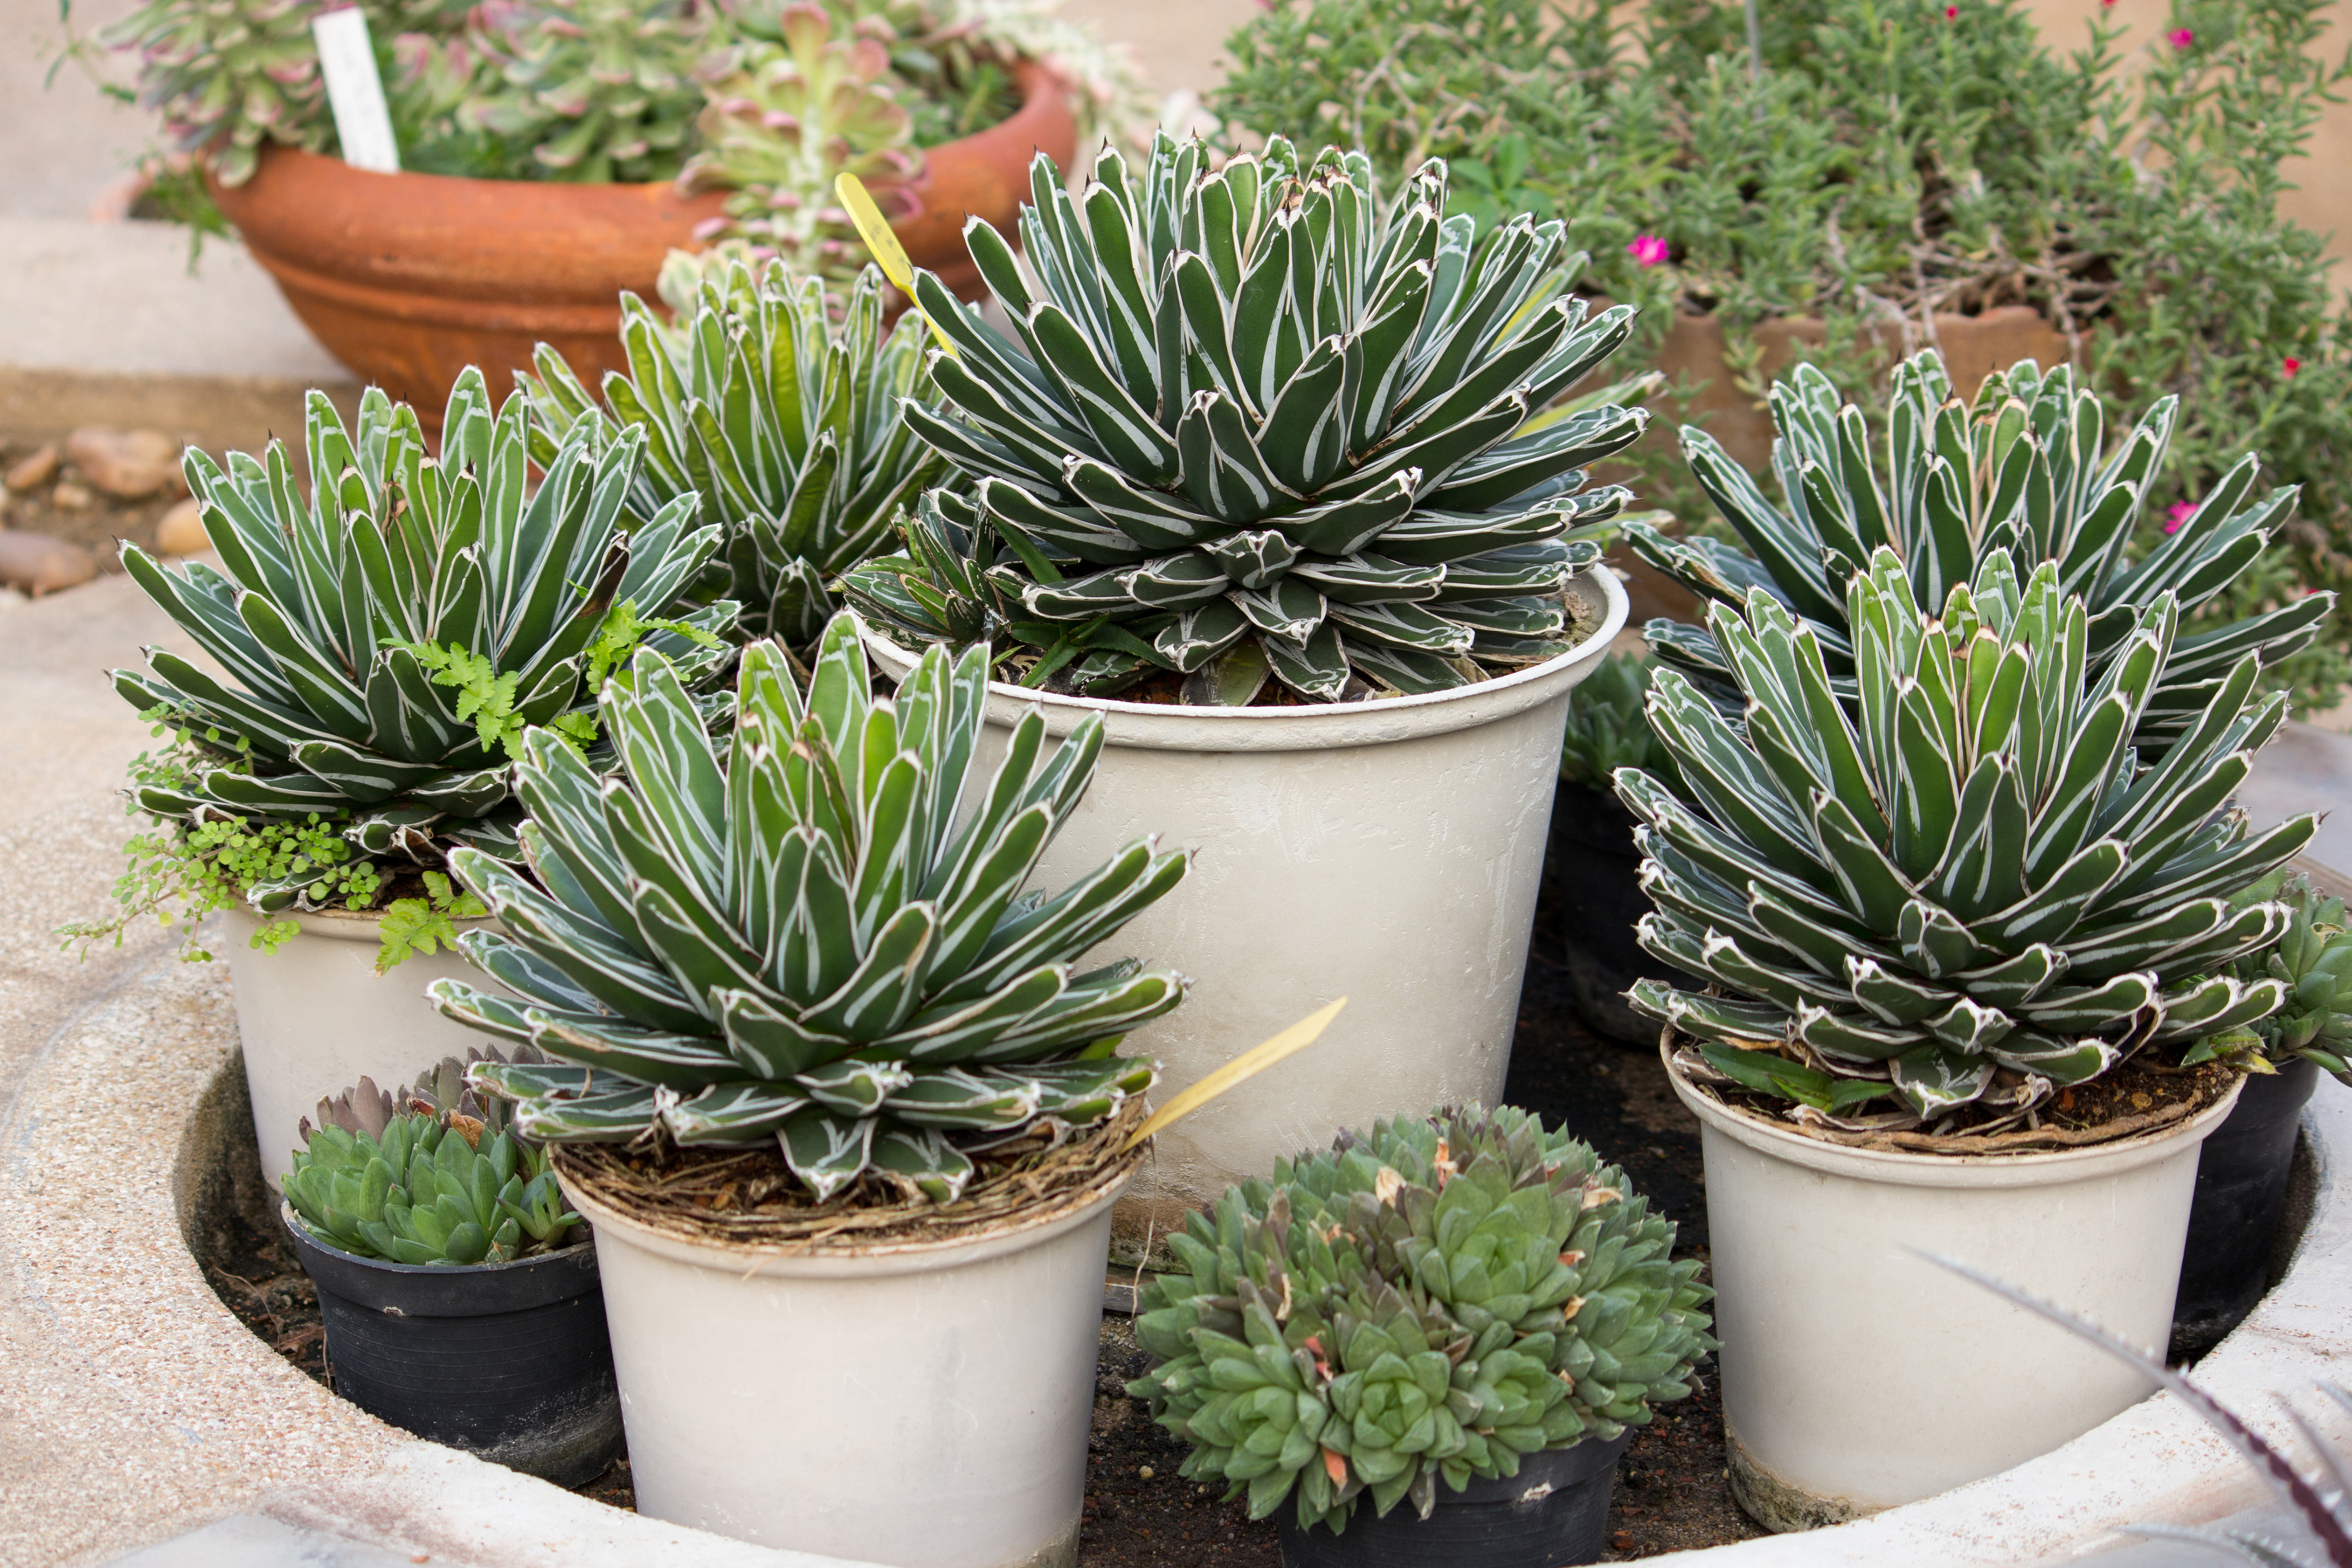
Propagating agave is immensely satisfying. They root well, adapt to their environment quickly, and support a wide range of animal and insect species. Their drought tolerance and range of shapes and colors make them an attractive addition to any garden, and their life cycle means you may never have to buy another agave plant ever again.